Setting up OpenID Connect SSO with Azure AD#
This guide explains how to set up an OpenID Client in Azure AD, for use with Argus OpenID integration.
Instructions#
Log on to https://portal.azure.com with your administrator account
Choose
App registrationsChoose
New registrationChoose a suitable/descriptive name, e.g. “Argus”. Keep selection for “Single tenant” and “Web”
Go to the new application instance
Copy the
client_idfrom the created application, and send it to mnemonic:show screenshot

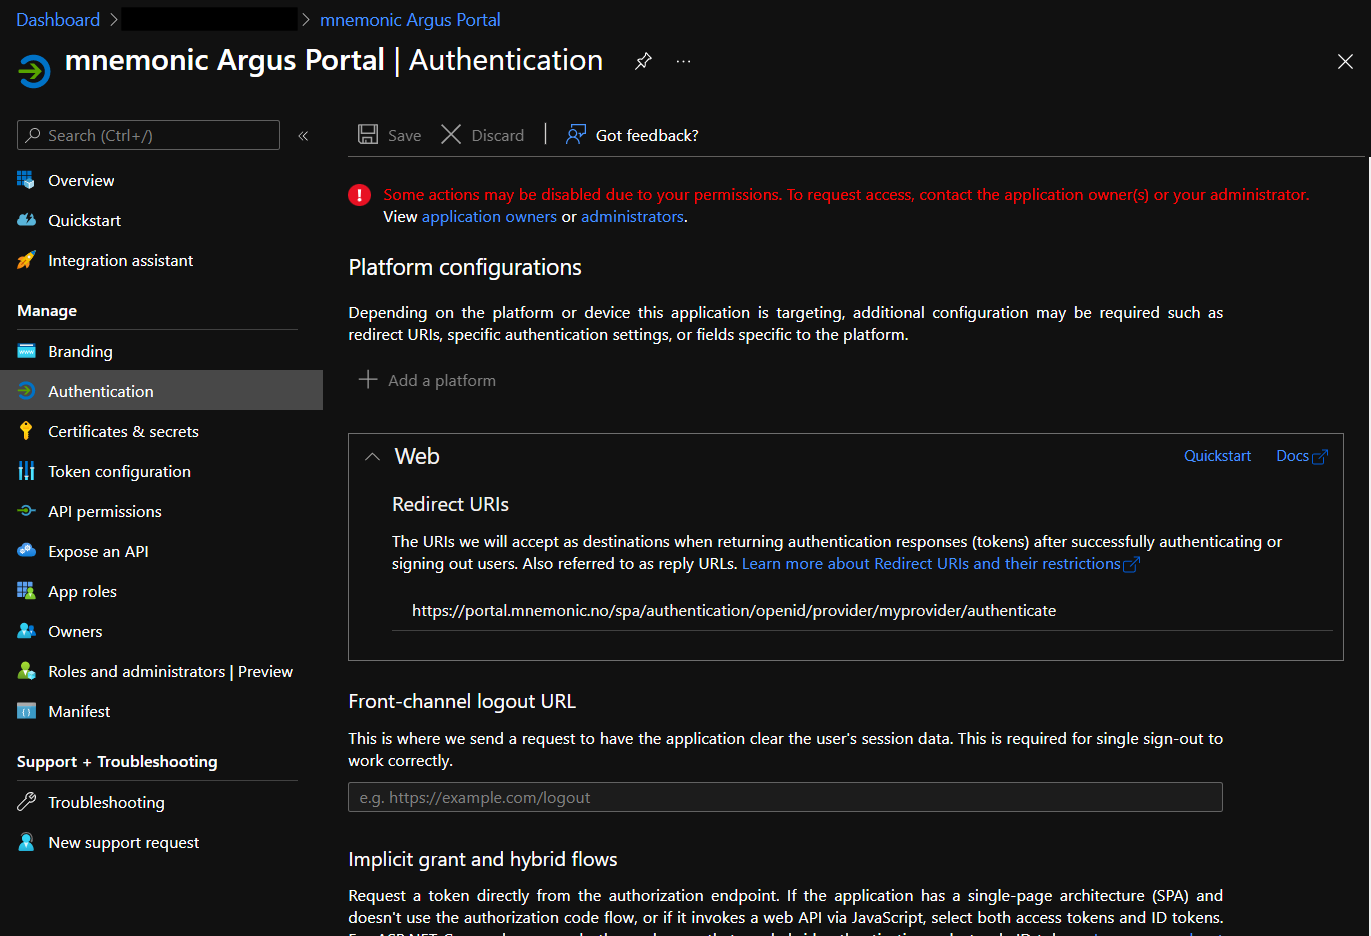
Choose
AuthenticationEnter the Redirect URI as
https://portal.mnemonic.no/spa/authentication/openid/provider/myprovider/authenticate(wheremyprovideris provided/agreed with mnemonic).show screenshot
Choose
SaveChoose
API PermissionsSelect
User.Readand chooseGrant admin consent for <your organization>
When mnemonic has received the client_id and completed configuration
in their end, you should be able to test SSO.
User mapping#
The default setup with Argus will use the email claim to identify the
user.
Currently, all users must be defined up front in Argus, and configured
with the email address that matches the email address returned by Azure
in the email claim.